Step-by-Step Guide: Installing Your Wine Guardian System from Wine Hardware
Introduction to Wine Guardian System installation
The installation of the Wine Guardian System from Wine Hardware is a step-by-step process that ensures optimal performance and preservation for your wine collection. This comprehensive guide provides an overview of the system, highlights its benefits, and outlines the necessary preparations before installation. By following these instructions, you can confidently set up the Wine Guardian System and enjoy the peace of mind that comes with knowing your wine is being properly stored and protected.
Overview of Wine Guardian System
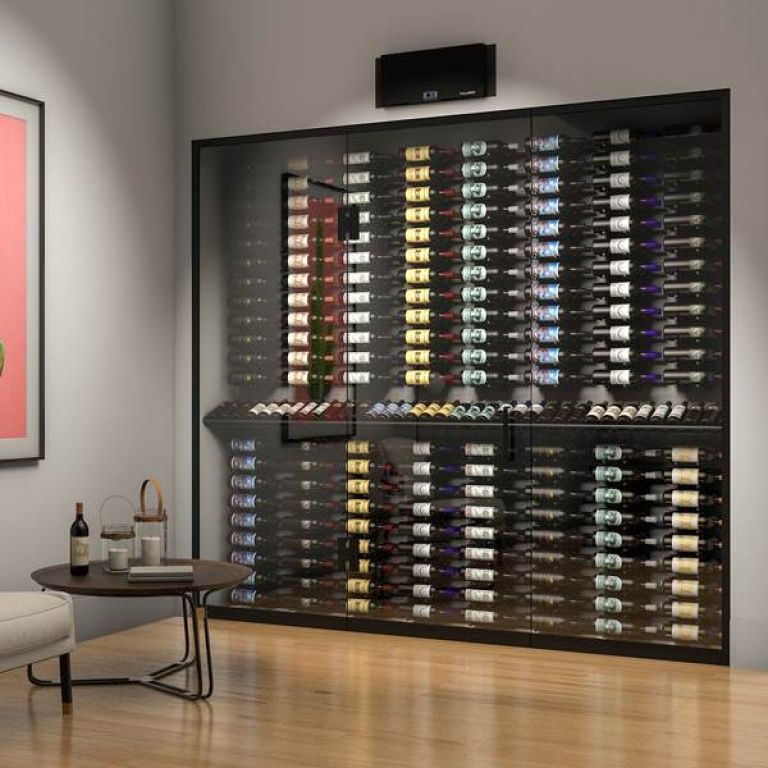
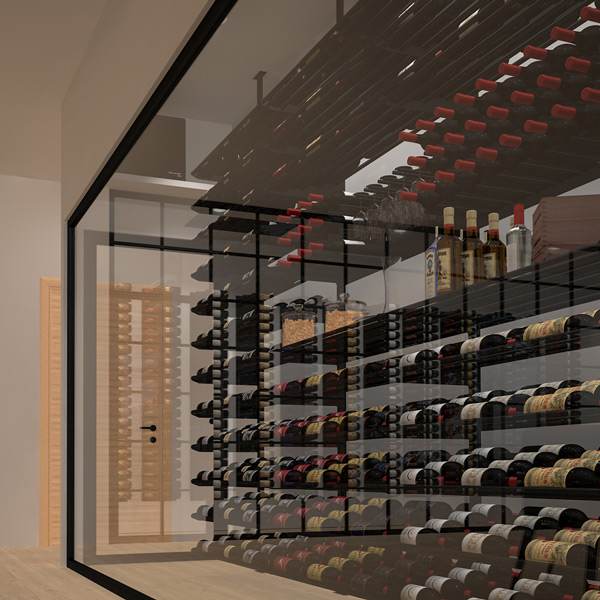
The Wine Guardian System from Wine Hardware is a state-of-the-art solution designed specifically for wine storage and preservation. It utilizes advanced technology to create the perfect environment for your wine collection. The system ensures precise temperature and humidity control, while also providing ventilation to prevent mold and musty odors. With its compact design and easy installation process, the Wine Guardian System is a reliable and efficient choice for wine enthusiasts looking to safeguard their investment.
Benefits of installing Wine Guardian System
Installing a Wine Guardian System from Wine Hardware offers several benefits for wine enthusiasts. The system ensures precise temperature and humidity control, creating an ideal environment for wine storage. This helps preserve the quality, taste, and aroma of the wines over time. Additionally, the system provides proper ventilation, preventing the growth of mold and eliminating musty odors. With easy installation and compact design, the Wine Guardian System is a reliable solution for safeguarding your valuable wine collection.
Preparation for Installation
Before beginning the installation process, it is important to take certain preparatory steps. One of the first things to do is to check the compatibility of the Wine Guardian System with the intended location. Ensure that the system meets the size and power requirements for your wine cellar or storage area.
Next, gather the necessary tools and materials for installation. This typically includes a drill, screws, a level, screwdrivers, measuring tape, and any additional accessories that may be required. It is essential to have these items on hand to ensure a smooth and efficient installation process.
Lastly, make sure to read through the installation instructions provided by Wine Hardware carefully. Familiarize yourself with each step to avoid any potential errors during the installation process. Proper preparation will help ensure a successful and hassle-free installation of your Wine Guardian System.
Checking compatibility of Wine Guardian System
The first step in installing the Wine Guardian System from Wine Hardware is to check its compatibility with the intended location. This involves ensuring that the system meets the size and power requirements for your wine cellar or storage area. Carefully review the specifications and dimensions of the Wine Guardian System to ensure it will fit properly within your space. Additionally, confirm that you have the necessary power supply available to accommodate the system’s electrical needs. Checking compatibility is crucial to ensure a seamless installation process and optimal performance of the Wine Guardian System.
Tools and materials required for installation
To successfully install the Wine Guardian System, several tools and materials are required. These include a measuring tape to ensure accurate dimensions, a level to ensure proper alignment, and a power drill or screwdriver for securing the system in place. It is also recommended to have ducting materials such as flexible ducts and clamps for proper airflow. Additionally, a power supply outlet should be available near the installation area to connect the system. Assembling the necessary tools and materials beforehand will facilitate a smooth and efficient installation process.
Unpacking and Setting Up Wine Guardian System
Unpacking Wine Guardian System components
Upon receiving the Wine Guardian System from Wine Hardware, carefully unpack all components to ensure everything is accounted for. This typically includes the main unit, ducting materials, clamps, and any additional accessories. Inspect each item for any damages or defects before proceeding with the installation.
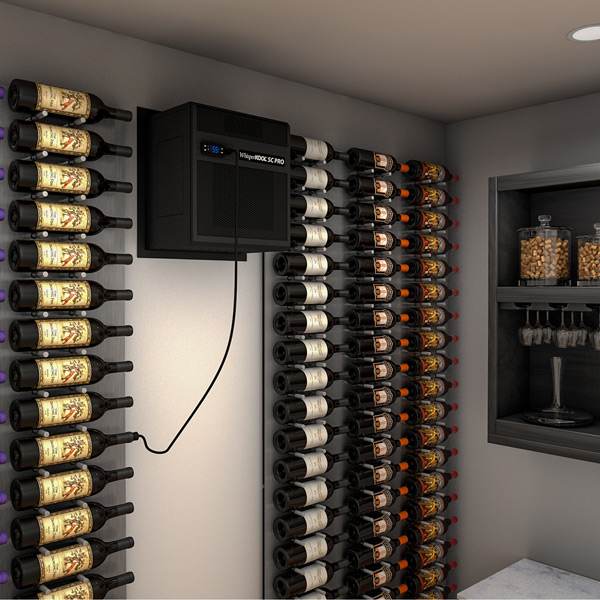
Setting up the Wine Guardian System unit
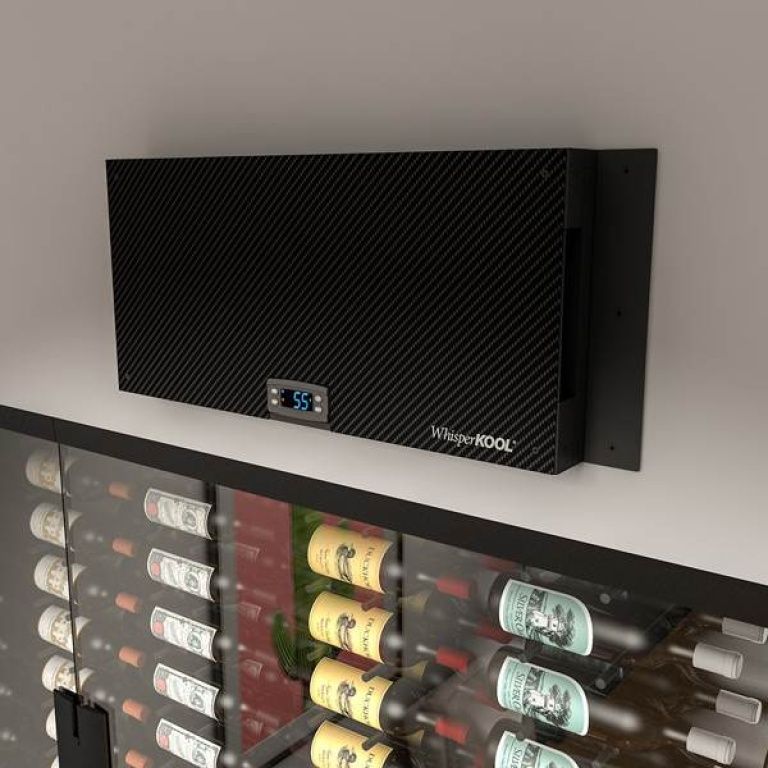
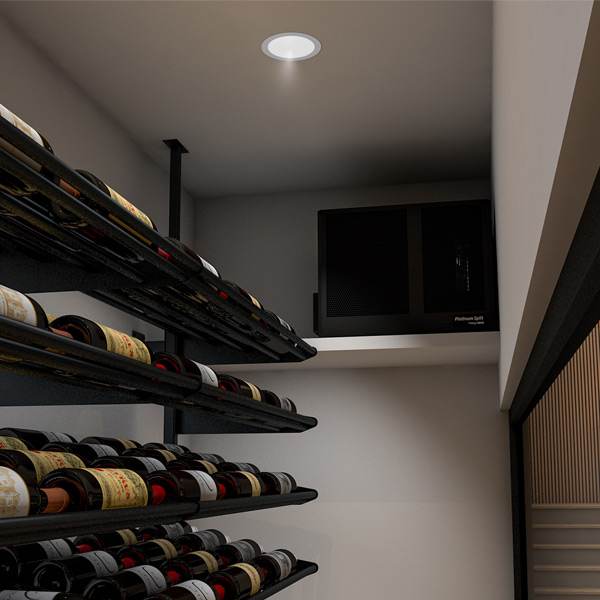
Begin by finding a suitable location for the Wine Guardian System unit. Ensure that it is placed in an area with adequate space, proper ventilation, and access to a power supply outlet. Use a measuring tape and level to ensure accurate placement and alignment of the unit. Once positioned correctly, secure the unit in place using a power drill or screwdriver.
Unpacking Wine Guardian System components
When unpacking the Wine Guardian System components, it is essential to ensure that all items are present and undamaged. Carefully inspect the main unit, ducting materials, clamps, and any additional accessories. This thorough examination ensures that there are no defects that may hinder the installation process. It is crucial to account for all components before proceeding with the setup. By doing so, you can ensure a smooth and successful installation of your Wine Guardian System from Wine Hardware.
Setting up the Wine Guardian System unit
The first step in setting up the Wine Guardian System unit is to find a suitable location for installation. Choose a spot that is close to the wine storage area and has enough space for proper ventilation.
Before mounting the unit, ensure that the surface is level and sturdy. Follow the manufacturer’s instructions for mounting, making sure to use the appropriate hardware.
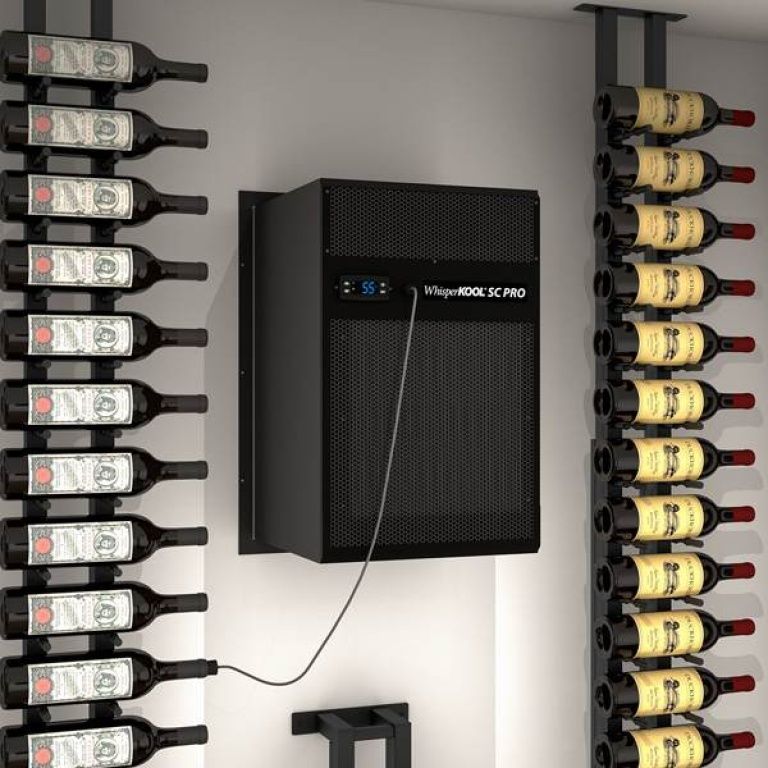
Next, carefully connect the ducting materials to the designated ports on the unit. Secure them tightly with clamps to ensure an airtight seal.
Once all the connections are made, double-check that everything is properly secured and aligned. This will help optimize the performance of the system.
Finally, plug in the power cord and turn on the Wine Guardian System unit. It is important to follow the specific startup procedures outlined in the product manual for proper initialization.
Electrical Connection and Startup
Connecting the Wine Guardian System to power
To connect the Wine Guardian System to power, first ensure that the unit is positioned near an electrical outlet. Check that the voltage requirements of the system match the available power supply. Using a certified electrician, safely connect the unit by following local electrical codes and guidelines. Avoid using extension cords or power strips, as they can cause electrical issues.
Starting up the Wine Guardian System for the first time
When starting up the Wine Guardian System for the first time, it is crucial to follow the specific startup procedures outlined in the product manual. This typically involves adjusting temperature and humidity settings according to your preferences. It may take some time for the system to stabilize and reach optimal performance, so be patient during this initial phase.
Remember to periodically check and clean the filters as recommended by Wine Hardware to maintain proper airflow and maximize efficiency. Regularly monitor the system’s operation and consult the product manual or contact Wine Hardware’s customer support if any issues arise.
By ensuring proper electrical connection and following startup guidelines accurately, users can fully benefit from their Wine Guardian System’s capabilities and enjoy precise temperature and humidity control for their wine storage needs.
Connecting the Wine Guardian System to power
To connect the Wine Guardian System to power, the user must first ensure that the unit is positioned near an electrical outlet. It is important to check that the voltage requirements of the system match the available power supply. Wine Hardware recommends using a certified electrician to safely connect the unit, following local electrical codes and guidelines. It is advisable to avoid using extension cords or power strips, as they can lead to electrical issues and potentially compromise the system’s performance.
Starting up the Wine Guardian System for the first time
Once the Wine Guardian System is properly connected to power, it is ready to be started up for the first time. This can be done by following a few simple steps. To begin, locate the power switch on the unit and make sure it is in the “off” position. Next, ensure that all ducting and ventilation components are properly installed and connected. Once this is done, switch on the power and allow the system to initialize. It is normal for the unit to take a few minutes to start up and calibrate. Once it has completed the startup process, the Wine Guardian System is ready to provide precise temperature control and humidity management for your wine collection.
Ducting and Ventilation Installation
Ducting and Ventilation Installation:
To ensure proper airflow and ventilation for the Wine Guardian System, it is crucial to install the ducting correctly. Begin by measuring and cutting the ductwork according to the system’s specifications. Make sure to use high-quality materials that are suitable for wine cellar environments.
Next, connect the ducts to the unit using appropriate connectors or adapters. Ensure that all connections are secure and airtight to prevent any air leaks. It is recommended to use foil tape or clamps for a more secure connection.
Properly position and secure the ductwork in the wine cellar, taking care to avoid any sharp bends or obstructions that could hinder airflow. Ideally, the ducts should be located near the ceiling for optimal air circulation.
In addition to ducting, sufficient ventilation is essential for the Wine Guardian System’s performance. Adequate fresh air intake and exhaust vents must be installed to maintain proper air exchange within the wine cellar. Consult Wine Hardware’s guidelines and local building codes for specific requirements.
During installation, ensure that there are no obstructions blocking the vents, such as furniture or stored items. This ensures efficient airflow and prevents temperature fluctuations within the wine cellar.
Regularly inspect and clean the ducting and vents to prevent dust buildup or blockages that could impede airflow. This maintenance routine helps maximize the Wine Guardian System’s efficiency and longevity.
Remember, proper installation of ducting and ventilation is critical for ensuring consistent temperature control and humidity management in your wine cellar with the Wine Guardian System from Wine Hardware.
Installing ducting for Wine Guardian System
Installing ducting for the Wine Guardian System is a crucial step in ensuring proper airflow and temperature control in your wine cellar. Begin by carefully measuring and cutting the ductwork to fit the specifications of the system. It is important to use high-quality materials suitable for wine cellar environments to prevent any damage or deterioration over time.
Next, securely connect the ducts to the Wine Guardian unit using appropriate connectors or adapters. Make sure that all connections are airtight to avoid any air leaks that could affect the system’s performance. Using foil tape or clamps can provide an extra level of security for these connections.
When positioning the ductwork in the wine cellar, it is important to avoid sharp bends or obstructions that could impede airflow. Ideally, the ducts should be located near the ceiling to promote optimal air circulation throughout the cellar.
In addition to installing the ducting, proper ventilation is essential for the Wine Guardian System. Adequate fresh air intake and exhaust vents must be installed to maintain proper air exchange within the wine cellar, ensuring consistent temperature and humidity levels.
During installation, it is important to check for any obstructions that may block the vents, such as furniture or stored items. Clearing these obstructions will ensure efficient airflow and prevent temperature fluctuations within the wine cellar.
Regular inspection and cleaning of the ducting and vents are necessary to prevent dust buildup or blockages that could hinder airflow. This maintenance routine will help maximize the efficiency and longevity of your Wine Guardian System.
By following these installation guidelines, you can ensure effective operation of your Wine Guardian System, providing optimal conditions for storing and aging your precious wine collection.
Ensuring proper ventilation for optimal performance
To guarantee optimal performance of the Wine Guardian System, proper ventilation is crucial. This ensures adequate air exchange within the wine cellar, maintaining consistent temperature and humidity levels. During installation, it is essential to install fresh air intake and exhaust vents appropriately. These vents allow for the circulation of fresh air into the cellar and the removal of stale air.
To ensure efficient airflow, it is important to clear any obstructions that may hinder the vents, such as furniture or stored items. This enables consistent airflow throughout the cellar and prevents temperature fluctuations that could potentially harm your wine collection.
Regular inspection and cleaning of the vents are necessary to prevent dust buildup or blockages that could obstruct proper airflow. By adhering to a maintenance routine, you can maximize the efficiency and longevity of your Wine Guardian System.
By prioritizing proper ventilation during installation and regularly maintaining your Wine Guardian System, you can create an optimal environment for storing and aging your valuable wine collection. Trust in Wine Hardware to provide you with high-quality systems that deliver exceptional results.
Final Checks and Troubleshooting
Before considering the installation complete, it is crucial to perform final system checks to ensure everything is functioning optimally. Start by double-checking all connections and fittings to make sure they are secure. This includes the power connection, ducting connections, and any additional accessories.
Next, test the functionality of the Wine Guardian System by adjusting the temperature and humidity settings. Monitor the unit’s performance for a period of time to ensure it is maintaining the desired conditions within your wine cellar.
If you encounter any issues during the final checks or during operation, refer to the troubleshooting section of the Wine Guardian System manual provided by Wine Hardware. The manual contains detailed instructions to help you resolve common installation challenges or technical difficulties.
In case you require further assistance or additional troubleshooting guidance, reach out to Wine Hardware’s customer support team. They are knowledgeable about Wine Guardian Systems and can provide expert advice tailored to your specific situation.
By conducting thorough final checks and promptly addressing any troubleshooting needs, you can have peace of mind knowing that your Wine Guardian System is installed correctly and operating efficiently. This ensures that your valuable wine collection is stored under ideal conditions for preservation and aging purposes
Performing final system checks
Performing final system checks is a crucial step to ensure the successful installation of the Wine Guardian System. The installer should start by thoroughly double-checking all connections and fittings to guarantee they are secure and properly tightened. This includes not only the power connection but also the ducting connections and any additional accessories.
After confirming the connections, it is important to test the functionality of the Wine Guardian System by adjusting the temperature and humidity settings. The installer should closely monitor the performance of the unit over a period of time to ensure it is maintaining the desired conditions within the wine cellar.
In the event of any issues during the final checks or during operation, referring to the troubleshooting section in the Wine Guardian System manual is highly recommended. This manual, provided by Wine Hardware, offers detailed instructions to help resolve common installation challenges or technical difficulties that may arise.
Should further assistance or additional troubleshooting guidance be required, the installer can reach out to Wine Hardware’s customer support team. Their knowledgeable staff can provide expert advice tailored specifically to address any issues related to Wine Guardian Systems.
By conducting thorough final system checks and promptly addressing any troubleshooting needs identified, installers can rest assured knowing that their Wine Guardian System is correctly installed and operating efficiently. This ensures that valuable wine collections are stored under ideal conditions for preservation and aging purposes.
Troubleshooting common installation issues
If any issues arise during the installation of the Wine Guardian System, reference the troubleshooting section in the Wine Guardian System manual provided by Wine Hardware. This comprehensive guide offers step-by-step instructions to help resolve common installation challenges or technical difficulties that may arise.
Some common installation issues include improper power connections, loose ducting connections, or incorrect temperature and humidity settings. The manual provides specific troubleshooting steps for each issue, allowing installers to quickly identify and resolve problems.
In the event that further assistance or additional troubleshooting guidance is required, installers can reach out to Wine Hardware’s dedicated customer support team. Their knowledgeable staff is well-equipped to provide expert advice tailored specifically to address any issues related to the installation or operation of Wine Guardian Systems.
By promptly addressing any troubleshooting needs identified during installation, installers can ensure that their Wine Guardian System is correctly installed and functioning optimally. This will guarantee that valuable wine collections are stored under ideal conditions for both preservation and aging purposes.